Drupal Migrate API: Migrate content from a JSON source
Posted on July 20, 2019
Migrate API
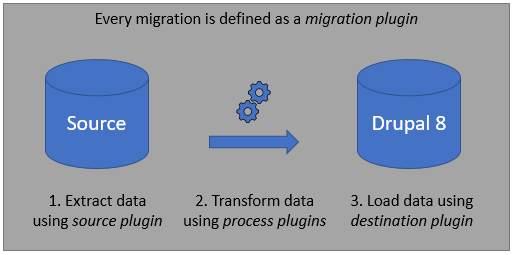
Migration plugins are the glue that binds a source, a destination, and multiple process plugins together to move data from one place to another. Often referred to as migration templates, or simply migrations, migration plugins are YAML files that explain to Drupal where to get the data, how to process it, and where to save the resulting object.
Migrations is an Extract - Transform - Load (ETL) process:

- extract phase is called source
- transform phase is called process
- load phase is called destination
Contrib module: migrate_plus
Migrate Plus extends the functionality of the Drupal Migrate API, adding new features, including the url source plugin, allowing us to perform migrations from JSON, XML and Soap file formats.
Contrib module: migrate_tools
Migrate Tools adds tools for running and managing migrations. Most importantly, the following drush commands we will be running when using migrations:
migrate-status - Lists all migrations and their status.
migrate-import - Runs a migration.
migrate-rollback - Rollback a migration.
migrate-reset-status - Resets a migration status to idle. Used if something goes wrong during the migration-import process, and the status gets stuck on "Importing".
Migration Json Example (from dados.gov.pt):
{"d": [
    {
        "PartitionKey":"mercadosamadora",
        "RowKey":"636541185252326807",
        "Timestamp":"2018-02-13T11:35:26.1849199Z",
        "entityid":"4e72fed3-3c67-45bb-a53ce125e59e36d0",
        "categoria":"Mercados",
        "subcategoria":"Mercados",
        "designacao":"Mercado de Alfragide",
        "morada":"Largo do Movimento das Forças Armadas",
        "freguesia":"Alfragide",
        "latitude":"38.735400753299999",
        "longitude":"-9.217441079000000"
    },
 ...
]}
A JSON Migration is all about configuration
A migration, when using already existing plugins, is nothing more than a .yml file, explaining how the data from the source should reach the destination.
In our example, the source will be a JSON file, and our destination will be an entity (node).
A Content Type was created beforehand, with the following fields that will be filled from the source file:
Node market:
title - Name of the market. Will be the designacao from the source file.
field_coordinates - A Geofield with the latitudes and longitudes from the source file.
field_freguesia - A taxonomy of type freguesia that will match the field with the same name from the source file.
field_id - A unique identifier that will match the entityId from the source file. We will use this as our migration ID.
field_address - Address of the market that will match the field morada from the source file.
And the taxonomy vocabulary Freguesia that will be used for the field_freguesia was also created.
Module migrate_markets:
Migrations needs to be attached to a module, as they will house the config files.
A custom module was created, under the modules/custom folder.
migrate_markets.info.yml
name: 'migrate_markets'
type: module
description: 'Migrates Amadora Markets.'
core: 8.x
package: 'Custom'
dependencies:
  - migrate
  - migrate_plus
And under the config/install folder of the module, we will create our migration file migrate_plus.migration.market.yml.
General identifying information
We can start off by setting the basic information for our migration there:
# The machine name for a migration. Also used by various CLI tools when
# referencing the migration as an argument for a command.
id: market

# A human-friendly description of the migration. This is used by various UI and
# CLI tools when showing a list of available migrations.
label: Migrate Amadora Markets from dados.gov.pt

# Optional group for the migration. This is a feature provided by the
# migrate_plus module and allows for running an entire group of migrations
# together.
migration_group: market
Destination
We can also go ahead and set the destination plugin, since it's very straightforward:
# Every migration must also have a destination plugin, which handles writing
# the migrated data in the appropriate form for that particular kind of data.
# This value should be the ID of the destination plugin to use.
#
# This is the load phase of your migration.
destination:
  plugin: entity:node
This tells the migration that it should place the data into a node. We can set which node type (bundle) that will later, on the process phase.
Source
For the source plugin, we will use the aforementioned url plugin, that comes with the contrib migrate_plus module.
# Every migration must have a source plugin. Set this to the ID of the plugin to
# use.
#
# This is the extract phase of your migration.
source:
  plugin: url
  # Specifies the http fetcher plugin.
  data_fetcher_plugin: http
  # Specifies the JSON parser plugin.
  data_parser_plugin: json
  headers:
    Accept: 'application/json; charset=utf-8'
    Content-Type: 'application/json'
  # One or more URLs from which to fetch the source data.
  urls:
    - https://dados.gov.pt/s/dadosGovFiles/mercadosamadora.json
  # For JSON, item_selector is the xpath used to select
  # our source items.
  item_selector: 'd'
  # For each source field, we specify a selector,
  # the field name which will be used to access the field in the
  # process configuration, and a label to document the meaning
  # of the field in front-ends.
  fields:
    -
      name: title
      label: 'Title'
      selector: /designacao
    -
      name: id
      label: 'ID'
      selector: /entityid
    -
      name: freguesia
      label: 'Freguesia'
      selector: /freguesia
    -
      name: address
      label: 'Address'
      selector: /morada
    -
      name: latitude
      label: 'Latitude'
      selector: /latitude
    -
      name: longitude
      label: 'Longitude'
      selector: /longitude

  # Under ids, we specify which of the source fields retrieved
  # above (id in this case) represent our unique
  # identifier for the item, and the schema type for that field.
  ids:
    id:
      type: string
This is a lot of different entries, so let's go step by step:
Plugin
We will use the url source plugin, located at modules/contrib/migrate_plus/src/Plugin/migrate/source/Url.php
This source plugin will have a fetcher and a parser plugin associated with it.
Data Fetcher
Migrate plus supports these data fetchers, located at modules/contrib/migrate_plus/src/Plugin/migrate_plus/data_fetcher:
- file
File.php - http
Http.php
Their use should be pretty straightforward. If we have the source file locally in our Drupal site, we would use file. Since we have an endpoint that automatically updates itself on an external URL, we will use the http fetcher instead. Note: This option supports Authorization. In our case, the endpoint is public, so it won't be necessary. The file itself provides an example annotation, that you can use if you want to know all the values it accepts.
Data Parser
As for data parsers, migrate_plus supports the following, located at modules/contrib/migrate_plus/src/Plugin/migrate_plus/data_parser:
- JSON
Json.php - SimpleXml
SimpleXml.php - Soap
Soap.php - Xml
Xml.php
We will use JSON on our examples, so we won't look over at all the other ones.
Headers
The headers property should be self-explanatory, and is used in conjunction with our http data fetcher. For our example, we just set the headers that prepare the request to receive a JSON response.
URLs
Here we set the URL(s) of our source, so the migration knows where to go get it. Also pretty self-explanatory.
Item Selector
This will be an xPath selector of the root where our data is. If you go look at our JSON example above, you will notice that all our data is inside an array of key d. So we tell the migration to go look inside that. If your JSON data is already inside the root of the JSON, you can set this to NULL.
Fields
fields is an array that will sort of serve as our bridge between the JSON fields into variables we can use on our process plugin.
They should have a name, which will let us reference them in the migration file.
The label is mostly used as an identifier for any UI dealing with migrations.
The selector, much like the previous item selector property, is an xPath selector indicating where the field in our source is located.
ID
The id property will match our unique identifier for this migration. This will ensure that, when re-running a migration, items that were already processed once won't be processed again.
An easy way to look at it, is to understand that the source plugin should answer the following questions:
Where is the source coming from? Defined on the urls property.
What am I getting from the source? Defined using the fields property.
How should I get the data from the source? Defined using the all the other properties.
Process
The only step left is configuring our process plugin.
# Here's the meat of the migration - the processing pipeline. This describes how
# each destination field is to be populated based on the source data. For each
# destination field, one or more process plugins may be invoked.
#
# This is the transform phase of your migration.
process:
  # Hardcode the destination node type (bundle) as 'market' using the
  # 'default_value' process plugin.
  type:
    plugin: default_value
    default_value: market

  # Simple field mappings that require no extra processing can use the default
  # 'get' process plugin. This just copies the value from the source to the
  # destination. 'get' is the default when no plugin is defined, so you can just
  # do destination_field: source_field.
  title: title

  field_id: id

  field_freguesia:
    plugin: entity_generate
    source: freguesia
    value_key: name
    bundle: freguesia
    entity_type: taxonomy_term

  field_address: address

  field_coordinates:
    plugin: geofield_latlon
    source:
      - latitude
      - longitude
Here we set how each source field should be processed by Drupal before ending up as fields for our destination node.
Each field will have at least one process plugin associated with it. If you don't explicitly set a plugin, and only do the mapping between Drupal destination field and source field, like our title, for example:
title: title
Then, by default, the get plugin will be used. It is a very basic plugin, that indicates that no processing of the JSON field is needed, and that the field should just be introduced as-is. So, the previous example, in the same as this:
title:
  plugin: get
  source: title
The key should be the destination (in our case, a node) field name, while the value should be the name attribute defined in our source field array.
Some fields will require the use of a process plugin. For example, to define our node type, in this example, we will hardcode the bundle of the node (aka the Content Type machine name), since we know that these nodes must all be of type market.
We can use the default_value plugin for this, which will provide a default value, if no source is provided or if the value from the source returns empty (Useful for fields that might not be set for all the JSON objects, but need to always have a value on our Drupal Entity).
We are using two contrib process plugins, one from the migrate_plus module, called entity_generate, and another one from the geofield module, called geofield_latlon.
The geofield_latlon plugin is very straightforward. it takes in both a latitude and a longitude values (that we set in our source fields), and creates a GeoField with them.
The entity_generate plugin will:
- Look for a taxonomy_term of type freguesia, and match the
sourcefieldfreguesia to the name of the taxonomy. - If a Taxonomy with that name already exists, that will be the one used.
- If not, one is created with that name.
In our example migration, we won't be using any custom process plugins, but if the plugins available from Core and the Migrate Plus module don't quite fit your needs, you can always easily make your own.
And that's it! Our final migrate_plus.migration.market.yml file looks like this:
id: market
label: 'Migrate Markets from dados.gov'
migration_group: market
destination:
  plugin: 'entity:node'
process:
  type:
    plugin: default_value
    default_value: market
  title: title
  field_id: id
  field_freguesia:
    plugin: entity_generate
    source: freguesia
    value_key: name
    bundle: freguesia
    entity_type: taxonomy_term
  field_address: address
  field_coordinates:
    plugin: geofield_latlon
    source:
      - latitude
      - longitude
source:
  plugin: url
  data_fetcher_plugin: http
  data_parser_plugin: json
  headers:
    Accept: 'application/json; charset=utf-8'
    Content-Type: application/json
  urls:
    - 'https://dados.gov.pt/s/dadosGovFiles/mercadosamadora.json'
  item_selector: d
  fields:
    -
      name: title
      label: Title
      selector: /designacao
    -
      name: id
      label: ID
      selector: /entityid
    -
      name: freguesia
      label: Freguesia
      selector: /freguesia
    -
      name: address
      label: Address
      selector: /morada
    -
      name: latitude
      label: Latitude
      selector: /latitude
    -
      name: longitude
      label: Longitude
      selector: /longitude
  ids:
    id:
      type: string
All that's left is to activate our module with drush en migrate_markets, and if everything went right we should already be able to see our migration show up using drush migration-status:

We can run our migration using drush migration-import market. When dealing with a large number of migration entities, it's recommended to use the limit flag with a small number, like --limit=10 or similar, when running the migration for the first time, to test if everything goes smoothly.

Note: I am using Lando as my development environment, so all my console commands will have lando prepended to them. Unless you're using it too, you probably won't need to type that.
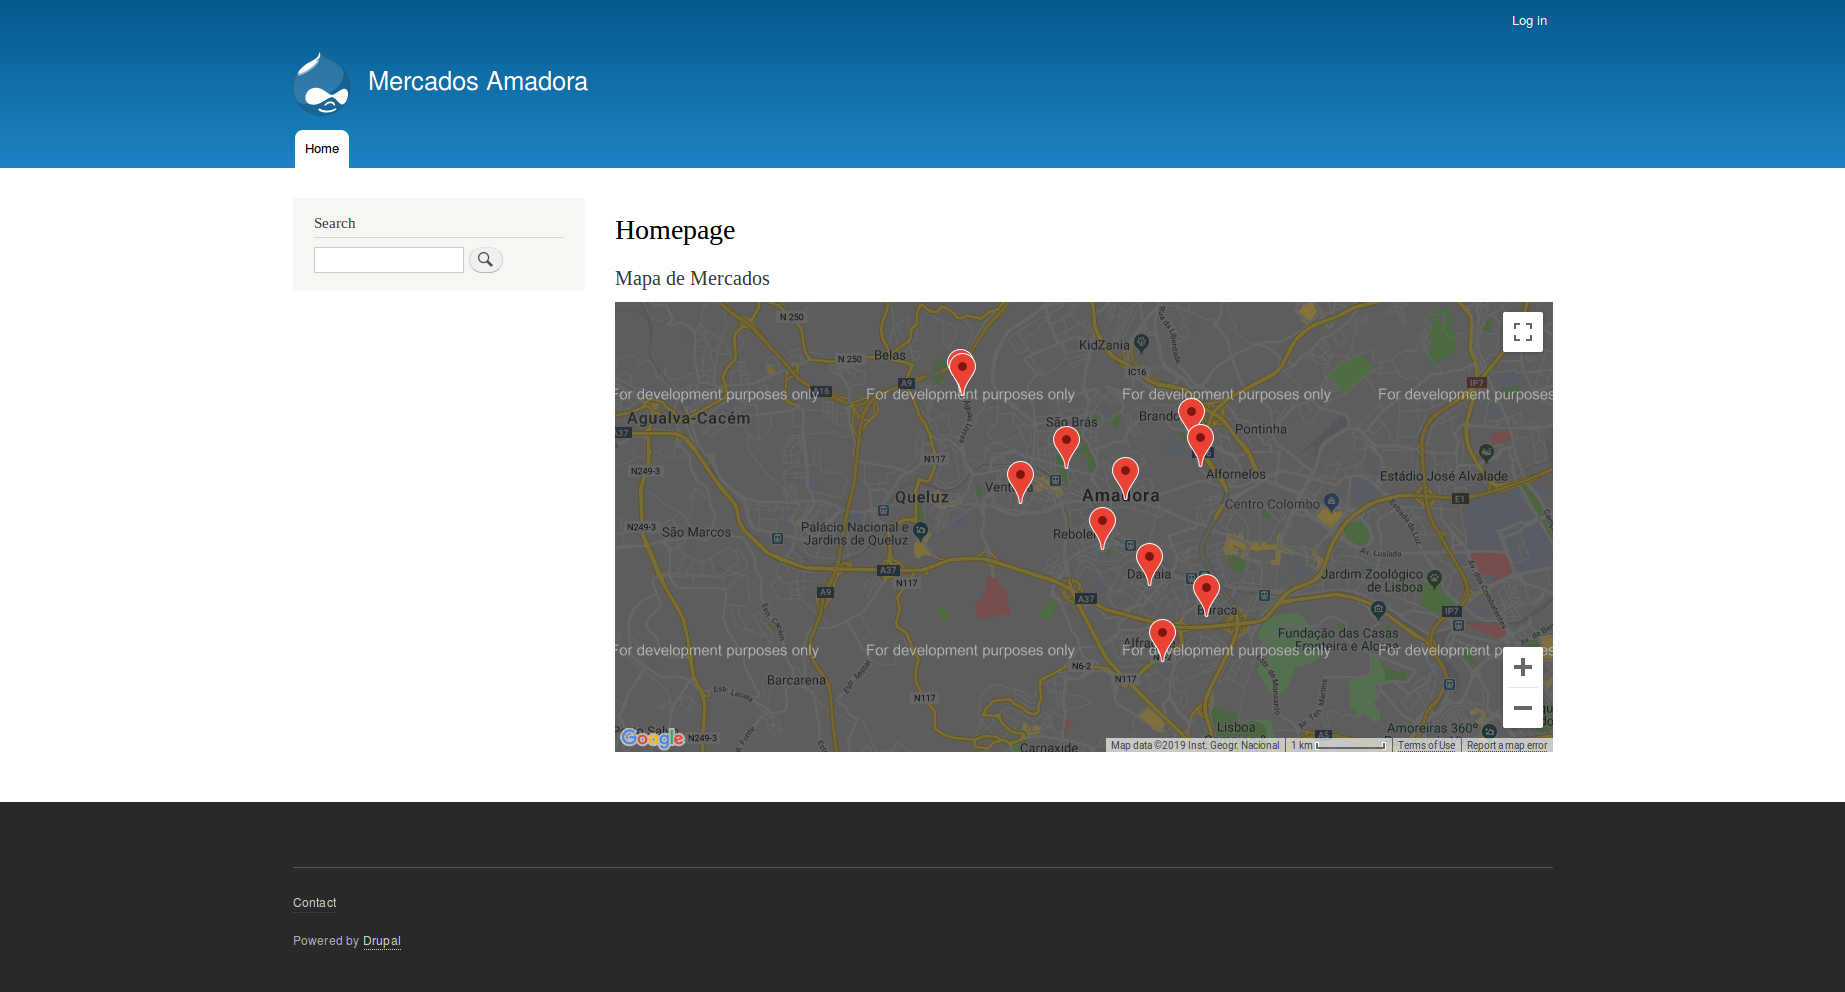
And that's it! We just powered out website up with all the Markets from the Amadora region. We could use that data to show a map of all the Markets around Amadora, for example:

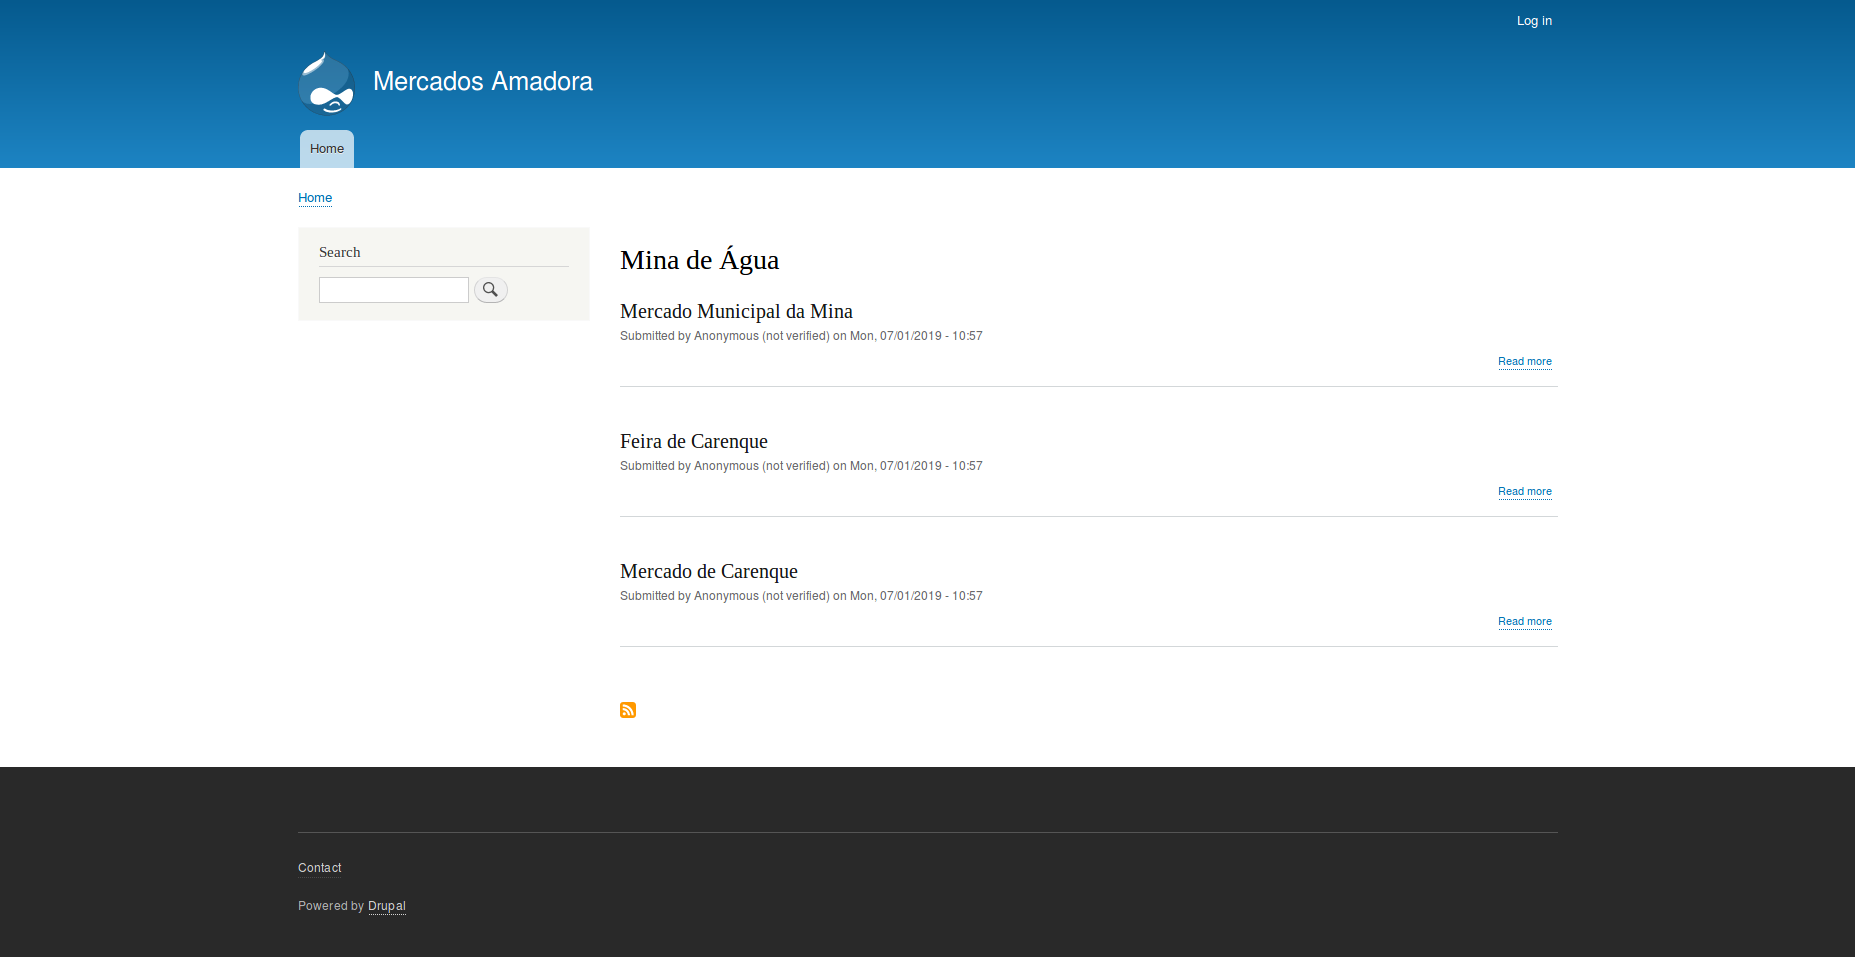
Or to list all the Markets on a specific Freguesia:

